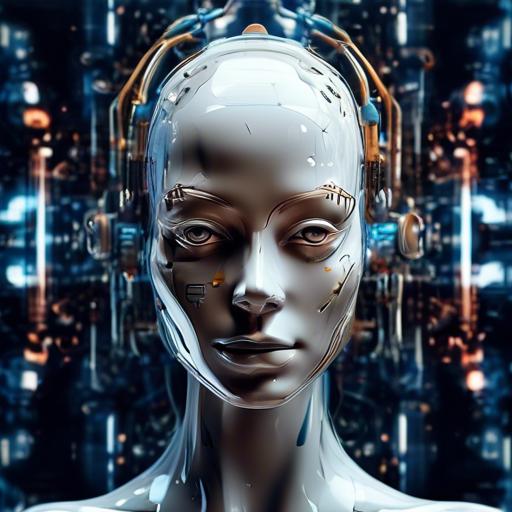
In the vast, vibrant universe of digital art and design, the power to create is at your fingertips, limited only by your imagination. Picture this: a canvas that knows no bounds, where every stroke of genius comes to life with mesmerizing textures that breathe soul into your creations. Enter the world of Blender, the powerhouse of 3D design, and artificial intelligence, the visionary muse capable of conjuring textures that dance with intricacy and realism. As you embark on this journey, we’re here to light your path, unlocking the secrets of using AI to generate stunning textures in Blender. Together, we’ll unravel a tapestry of techniques, transforming your artistic dreams into tangible reality, one pixel at a time.
Table of Contents
- Understanding the Basics of AI in Texture Creation
- Choosing the Right AI Tools for Blender
- Integrating AI Plugins Seamlessly with Blender
- Mastering AI-Enhanced Texture Generation Techniques
- Optimizing Workflow for Efficiency and Creativity
- Exploring Advanced AI Features for Unique Textures
- Troubleshooting Common Issues in AI Texture Generation
- Elevating Your Blender Projects with AI Textures
- The Way Forward
Understanding the Basics of AI in Texture Creation
Artificial Intelligence has significantly revolutionized the creative industry, particularly in the realm of texture generation for 3D modeling. When delving into AI-powered texture creation, it’s essential to understand a few cornerstone concepts that form the bedrock of this fascinating technology.
First off, AI-driven texture creation involves **machine learning algorithms** that have been trained on an extensive dataset of images and textures. These algorithms analyze and learn the intricate details, patterns, and variations found in natural materials, enabling them to generate highly realistic textures. This process often utilizes **Generative Adversarial Networks (GANs)**, where two neural networks, a generator and a discriminator, work in tandem to create textures that are virtually indistinguishable from real-world counterparts.
- Training Data: High-quality images and textures are fed into the model to help it learn the nuances of different materials.
- Style Transfer: AI can transfer the style from one image to another, integrating new patterns into existing textures.
- Pattern Recognition: Identifies and recreates complex patterns and seamlessly blends them into new textures.
In Blender, leveraging AI for texture creation can streamline your workflow. Blender’s add-ons and plugins, such as TextureNinja or Artomatix AI, harness AI capabilities to speed up the process of creating, refining, and seamlessly integrating textures into 3D models. Utilizing these tools, you can save tremendous time and get consistent, high-quality results without the meticulous manual effort.
| AI Tool | Key Feature | Benefit |
|---|---|---|
| TextureNinja | Automatic Texture Generation | Quick and easy setup |
| Artomatix AI | Seamless Texture Creation | Reduces manual adjustments |
Understanding these basics can empower you to integrate AI into your texture creation process more effectively. As you become more adept at utilizing these AI tools, you’ll find that the time and effort saved allows you to focus more on the creative aspects of your projects, ultimately elevating the quality and realism of your 3D models.
Choosing the Right AI Tools for Blender
Identifying the best AI tools for generating textures in Blender can significantly streamline your workflow and elevate your project’s visual appeal. With a multitude of options at your disposal, it’s crucial to select tools that seamlessly integrate with your existing setup while offering powerful texture generation capabilities.
- GIMP: A versatile image editor that complements Blender well. When enhanced with AI plug-ins like G’MIC, it can generate complex textures using neural networks.
- Substance Alchemist: This tool excels in creating high-quality textures with the help of machine learning algorithms. It offers an intuitive interface and robust integration with Blender.
- Deep Dream Generator: If you’re looking for creative and unique textures, this tool leverages AI to transform images into surreal textures, adding an artistic flair to your 3D models.
- NVIDIA Texture Tools: Utilize the power of AI and machine learning with NVIDIA’s toolset. They provide exceptional texture compression and generation features, geared towards professional usage.
When choosing, consider the following factors:
- Compatibility: Ensure that the tool integrates smoothly with Blender to minimize any disruptions in your workflow.
- Ease of Use: A user-friendly interface can save you time and make the learning curve less steep.
- Quality and Customization: The tool should generate high-quality textures and offer various customization options to meet your specific needs.
Here’s a quick comparison of some popular tools:
| Tool | Integration | AI Capabilities | User-Friendliness |
|---|---|---|---|
| GIMP (with G’MIC) | Good | Moderate | Medium |
| Substance Alchemist | Excellent | High | High |
| Deep Dream Generator | Good | High | Medium |
| NVIDIA Texture Tools | Excellent | High | Medium |
By focusing on compatibility, user-friendliness, and the AI capabilities of these tools, you can achieve remarkable results in Blender. Each tool has its own unique strengths, so take the time to explore them and find the best fit for your projects.
Integrating AI Plugins Seamlessly with Blender
Blender’s robust toolkit opens a world of creative possibilities and, when paired with AI plugins, the results can be nothing short of magical. Here’s how you can effortlessly integrate these digital co-pilots into your workflow to generate stunning textures for your projects.
Step-by-Step Integration
- Install the Plugin: Begin by selecting an AI plugin that suits your texture generation needs and install it following the plugin’s documentation.
- Configure Settings: Dive into the plugin settings within Blender to fine-tune the AI’s parameters. This might include resolution settings, texture types, and other variables.
- Generate Textures: With the settings configured, prompt the AI to generate textures. This could be done through simple clicks or by inputting commands directly into the plugin.
Troubleshooting Common Issues
| Issue | Solution |
|---|---|
| Plugin not installing | Ensure Blender is updated to the latest version. Check compatibility and reinstall if necessary. |
| Textures not generating | Check configuration settings and ensure they are correctly aligned with your project’s specifications. |
| Output quality issues | Adjust the AI’s resolution settings or test different texture types to find the optimal setup. |
Maximizing Results
- **Texture Variety:** Experiment with various AI plugins to find the one that produces the most dynamic and visually appealing textures.
- **Custom Commands:** Utilize custom commands if the plugin supports them. This can yield more unique and tailored results.
- **Blend Techniques:** Use the AI-generated textures as a base and apply traditional texturing techniques in Blender to further enhance and polish your assets.
With just a few steps, integrating AI plugins with Blender can transform how you create textures, streamlining your workflow and vastly enriching your creative outputs. By experimenting and customizing your approach, these tools become not just utilities but active partners in your artistic process.
Mastering AI-Enhanced Texture Generation Techniques
To elevate your texture creation game using Blender, you’re going to need a combination of powerful AI tools and detailed techniques. One of the most accessible and efficient ways to generate stunning textures is by integrating AI-powered texture generation models directly into your Blender workflow.
Key AI Tools for Texture Generation:
- DeepArt: An AI model that converts simple images or sketches into highly detailed textures.
- Nvidia Texture Tools: Advanced tools from Nvidia that offer real-time texture synthesis.
- DALL-E: OpenAI’s powerful model that can generate unreal textures based on textual descriptions.
Integrating these tools into Blender involves using plugins and sometimes custom scripts. For example, DeepArt can be utilized to import generated textures directly into your Blender shader editor, creating seamless surfaces in minutes.
Steps for Using AI in Blender:
| Step | Description |
|---|---|
| 1. Choose AI Tool | Select the AI model that best fits your project needs. |
| 2. Generate Texture | Use the chosen tool to create your base texture design. |
| 3. Import into Blender | Utilize Blender’s add-ons or import functionality to bring in the generated texture. |
| 4. Apply and Adjust | Map the texture onto your 3D model and fine-tune using Blender’s editing tools. |
Remember to experiment with different settings and parameters within the AI tools to explore a variety of texture styles. Often, it’s the unexpected results that can lead to the most unique and eye-captivating designs. Utilizing AI to generate textures doesn’t just save time but also drastically widens the creative scope of what’s possible in your 3D projects.
Optimizing Workflow for Efficiency and Creativity
To maximize the potential of Blender when generating textures, integrating AI can be a game-changer. **AI tools** enable faster, more detailed, and highly customized textures that can significantly enhance both efficiency and creativity. Here’s how you can leverage AI to optimize your workflow:
**Utilize Pre-trained AI Models**
- Access a library of pre-trained models specifically designed for texture generation.
- Quickly generate textures by simply inputting desired parameters.
- Save valuable time by avoiding tedious manual creation steps.
**Custom Texture Training**
For unique needs, you can train your own AI models using your datasets. This might seem daunting, but with readily available tools, even beginners can create bespoke textures tailored to their specific projects. The **creative freedom** offered by custom-trained models ensures that your work stands out from the crowd.
| Method | Pros | Cons |
|---|---|---|
| Pre-trained Models | Time-efficient, Easy to use | Limited customization |
| Custom Training | Highly Customizable, Unique | Time-consuming, Higher learning curve |
**Real-time Adaptive Textures**
One of the most exciting applications is creating **adaptive textures** that can auto-adjust in real-time based on the object’s environment. Imagine a material that changes color based on the lighting or surface it is applied to, providing a dynamic and immersive experience for the user.
**Incorporate AI-assisted Tools**
- Use AI plug-ins designed for Blender, such as NVIDIA’s AI-enhanced texture tools.
- AI-based upscaling tools can expand small textures into high-resolution versions without losing quality.
- AI can seamlessly blend textures, eliminating the headache of texture seams and mismatches.
By weaving AI into your Blender workflow, you’re not just speeding up the process, you’re also pushing the boundaries of what’s creatively possible. The fusion of **efficiency and innovation** ensures your work remains captivating and ahead of the curve.
Exploring Advanced AI Features for Unique Textures
Blender has long been cherished for its power and flexibility, but the integration of advanced AI brings a whole new dimension to texture creation. By using AI-driven tools, you can unlock endless possibilities and introduce unique visual elements to your projects. Here are some advanced AI features that you can leverage:
- AI Texture Generation: Transform basic images into complex patterns and textures more efficiently. AI can generate seamless textures that adapt to different materials and lighting scenarios, enhancing realism.
- Style Transfer: Borrow the aesthetic elements of one image and apply them to your textures. AI can replicate the brush strokes, color palettes, and artistic styles, infusing your textures with a distinct, creative touch.
- Deep Learning Models: Utilize pre-trained models to enhance textures. Deep learning can recognize and apply intricate details, whether it’s the grain of wood, the softness of fabric, or the roughness of stone.
One of the remarkable aspects of AI in Blender is how it simplifies the texturing workflow. For instance, the use of AI texture synthesis tools can automate the creation of large texture maps from small samples, ensuring consistency and reducing manual effort. This not only saves time but also maintains the artistic integrity of your designs.
Furthermore, AI-enhanced procedural texturing allows for the creation of dynamic textures that react to changes in the environment, such as lighting and perspective. This feature is particularly useful for game developers and animators who require textures to adapt seamlessly to various in-game conditions. Imagine a stone wall that ages over time or grass that waves in the wind, all driven by intelligent algorithms.
| Feature | Description |
|---|---|
| AI Texture Generation | Automatically create complex, seamless textures from simple images. |
| Style Transfer | Apply artistic styles from one image to another for unique texturing. |
| Deep Learning Models | Enhance textures with advanced pre-trained models for realistic details. |
By exploring these advanced AI features, you can push the boundaries of what’s possible in Blender. The fusion of AI technology with creative design not only streamlines the texturing process but also opens up new avenues for artistic expression. Embrace these innovative tools to elevate your projects and craft textures that truly stand out.
Troubleshooting Common Issues in AI Texture Generation
Working with AI texture generation in Blender can sometimes be challenging, but knowing how to navigate common issues can save you a lot of time and hassle. Let’s delve into some frequent problems and effective ways to troubleshoot them.
1. Blurry or Low-Resolution Textures
- **Texture Resampling**: Ensure that your input images are of high resolution. AI models often depend heavily on the quality of the source material.
- **Model Parameters**: Check the settings of your AI model. Sometimes, tweaking the resolution and scale parameters can significantly improve output quality.
- **Post-Processing**: Use Blender’s built-in compositing tools to sharpen and enhance textures.
2. Unsynchronized Textures
- **UV Mapping Issues**: Ensure your UV maps are properly aligned. Misaligned UVs can cause textures to stretch or tile incorrectly.
- **Seamless Texturing**: Utilize algorithms or plugins that support seamless texturing to avoid noticeable seams on your models.
- **Consistent Lighting**: Make sure that the lighting in your source images is consistent. Inconsistent lighting can create noticeable transitions between textures.
| Issue | Solution |
|---|---|
| Blurry Textures | Adjust resolution and use high-quality input images |
| Misaligned UV Maps | Check UV mapping and use seamless texturing plugins |
| Inconsistent Lighting | Ensure uniform lighting in source images |
3. Slow Processing Time
- **Hardware Limitations**: Ensure your hardware meets the minimum requirements for AI texture generation. Upgrading your CPU or GPU can drastically reduce processing times.
- **Batch Processing**: Break down your tasks into smaller batches to manage memory more efficiently. This is particularly useful when working with extremely high-resolution textures.
- **Optimize Workflow**: Utilize Blender’s performance optimization tools, such as reducing viewport render quality and enabling denoising techniques.
Elevating Your Blender Projects with AI Textures
Unleashing the potential of AI to create stunning textures can transform your projects in Blender. Gone are the days when texture creation was a painstaking process that required hours of manual effort. Today, leveraging advanced algorithms and neural networks, you can generate intricate, high-quality textures with just a few clicks. Imagine the power of automation combined with artistry—AI texture generation offers just that.
**Why Use AI Textures?**
- Efficiency: Save time with quick generation.
- Consistency: Maintain a unified look across various elements.
- Endless Possibilities: Access an infinite variety of patterns and designs.
These textures aren’t just quick fixes; they bring a level of detail and precision that often surpasses what’s possible by hand. From rugged stone surfaces to delicate fabrics, the algorithms can handle an impressive range of styles and complexities.
**Getting Started with AI Tools in Blender**
To integrate AI into your workflow, you’ll first need to access a generative AI tool. Popular platforms like Deep Dream Generator, Artbreeder, or even specialized plugins like Nodia can help you create textures that seamlessly import into Blender. Here’s a brief comparison to help you choose the right tool:
| Tool | Special Features | Ease of Use |
|---|---|---|
| Deep Dream Generator | Deep-learning-based patterns | Intermediate |
| Artbreeder | Collaborative & customizable | Beginner |
| Nodia | Blender-specific plugin | Advanced |
Once you’ve picked your tool and generated your desired texture, importing it into Blender is straightforward. Use the **Image Texture** node in the Shader Editor to link your image to the material properties of your 3D model. Voila! Your AI-generated texture is now active in your scene.
**Finishing Touches**
While AI does the heavy lifting, your role as an artist brings the final finesse. Utilize Blender’s myriad of tools to tweak and adjust the textures. Play with lighting, bump maps, and other shaders for an added layer of realism. Combine multiple AI textures or blend them with your handcrafted elements for a unique composite. The result? A polished masterpiece that’s uniquely yours but crafted with the efficiency and precision only AI can offer.
The Way Forward
As you continue on your creative journey in the world of Blender, remember that AI is a powerful tool that can help bring your vision to life. By utilizing AI to generate textures, you can unlock a whole new level of possibilities for your projects. Experiment with different techniques, try out new approaches, and don’t be afraid to push the boundaries of what you thought was achievable. With AI by your side, there’s no limit to what you can create. So go forth, dear artist, and let your imagination run wild. The future of texturing in Blender is in your hands. Embrace it, explore it, and most importantly, enjoy the process. Happy creating!


