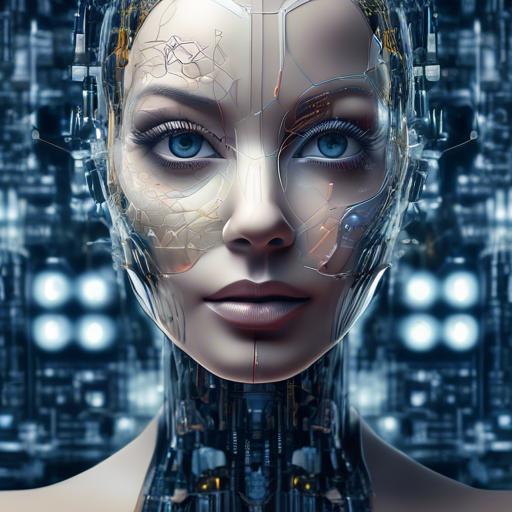
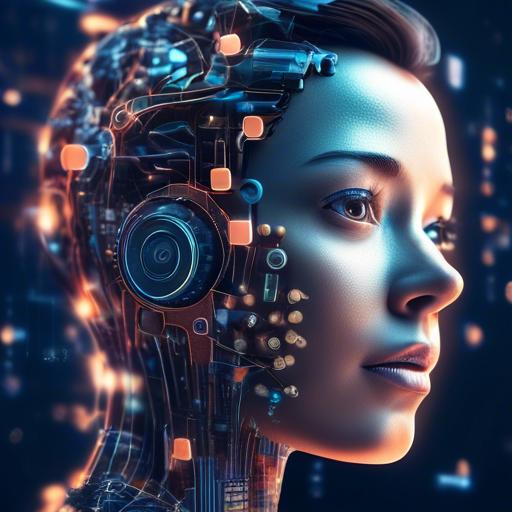
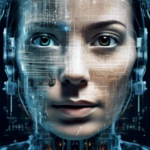
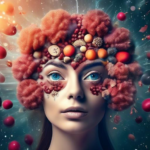
Picture this: You, an artist at heart, standing before a blank canvas, brushes in hand, with endless possibilities at your fingertips. Now, imagine that canvas is digital, and the brushes are sophisticated pieces of artificial intelligence. Welcome to the future of creativity, where AI image generation software becomes the artist’s muse and partner, rather than a mere tool.
In this ever-evolving digital renaissance, the way we conceptualize and create art is undergoing a metamorphosis. The confluence of technology and creativity allows us to explore uncharted territories of expression and imagination. Whether you’re a seasoned designer, an enthusiastic hobbyist, or a curious novice, the power to create stunning visuals with AI is within your grasp. But it’s not just about using the software—it’s about making it truly yours.
Customizing AI image generation software can transform your creative process, tailoring it to fit your unique vision and style. This article is your guide through this exhilarating journey. We’ll delve into the myriad ways you can tweak, tune, and tailor the AI to not only meet but exceed your artistic expectations. Let’s embark on this creative adventure together, where your ideas fuse seamlessly with cutting-edge technology to bring your wildest imaginations to life. Welcome to a world where you are the master of your digital masterpiece.
Table of Contents
- Choosing the Right AI Image Generation Tool for Your Needs
- Understanding Neural Networks and Artistic Styles
- Fine-Tuning Parameters for Optimal Image Quality
- Incorporating User Feedback for Continuous Improvement
- Leveraging Pre-Trained Models to Save Time
- Creating Custom Art Styles with Advanced Techniques
- Integrating AI with Graphic Design Software for Enhanced Creativity
- Future Outlook
Choosing the Right AI Image Generation Tool for Your Needs
Choosing the right AI image generation tool can be a game-changer for your creative projects. With a myriad of options available, it’s essential to determine which tool best meets your specific needs. Here are some crucial factors to consider:
- Purpose and Application: Are you looking to create realistic images, abstract art, or perhaps something in between? Different tools excel in different areas. For example, DALL-E and MidJourney are renowned for their creativity, while tools like DeepArt.io focus on artistic style transfers.
- Ease of Use: Not all tools are user-friendly, especially for beginners. Look for platforms that offer intuitive interfaces, comprehensive tutorials, and an active support community. This will ensure that you spend more time creating and less time troubleshooting.
- Customization Options: The degree of customization available can significantly impact your results. Some tools allow extensive manipulation of variables like color schemes, brush styles, and image resolution, while others offer more preset options.
Here’s a quick comparison of some top AI image generation tools:
| Tool | Best For | Customization | Ease of Use |
|---|---|---|---|
| DALL-E | Creative Images | High | Moderate |
| DeepArt.io | Artistic Style Transfers | Moderate | High |
| RunwayML | Professional Use | Very High | Moderate |
Budget is another significant factor. Some tools offer free versions with basic features, while others come with a subscription plan for added functionalities. Evaluate the cost-benefit ratio carefully, especially if you are working with limited resources. Free options like Craiyon can be a good starting point, but investing in a premium tool might be worth it for serious projects.
don’t overlook the importance of community and support. Many platforms offer forums, chat groups, and FAQs to help you get the most out of the software. Engaging with other users can provide valuable insights and tips, making your journey smoother and more enjoyable.
Understanding Neural Networks and Artistic Styles
Neural networks revolutionize the way we create and perceive digital art. By mimicking the brain’s ability to recognize patterns, these networks can generate images that combine the structural elements of one image with the artistic style of another—a process known as style transfer. But how exactly does this work?
At the core of these artistic endeavors lies the **Convolutional Neural Network (CNN)**. A CNN can identify specific features within an image, such as edges, shapes, and textures. This is accomplished through multiple layers that progressively extract higher-level features from the input data. In the realm of artistic styles, this means that a neural network can analyze the textures of van Gogh’s brushstrokes while recognizing the structural integrity of a portrait.
When customizing AI image generation software, consider the following elements:
- Selection of Style Images: Choose high-quality images that best represent the artistic flavor you wish to emulate.
- Parameter Tweaks: Adjust parameters such as learning rate, number of layers, and the ratio of style-to-content weight to fine-tune the results.
- Pre-processing: Ensure input images are pre-processed to remove noise and standardize dimensions. This standardization is crucial for maintaining consistency across various outputs.
Moreover, understanding the impact of each parameter is crucial. Here’s a distilled view of key parameters and their roles:
| Parameter | Role |
|---|---|
| Learning Rate | Controls how much to change the model in response to the estimated error each time it updates weights. |
| Content Weight | Determines the importance of content representation in the final output. |
| Style Weight | Influences the prominence of artistic style over the content in the final image. |
To truly master the art of neural network-based image generation, experimentation is key. Don’t be afraid to make multiple iterations, tweaking and retuning parameters until you achieve your desired artistic output. Each adjustment brings you closer to unlocking the full potential of AI-driven creativity.
Fine-Tuning Parameters for Optimal Image Quality
When it comes to achieving the best image quality in AI-generated visuals, tweaking the fine-tuning parameters is essential. **Parameter optimization** can dramatically affect the **output’s clarity**, **color balance**, and **overall realism**. Let’s dive into how you can customize these parameters for optimal results.
Start by focusing on **resolution settings**. Higher resolutions will yield more detailed and lifelike images. However, they also require more computational power. Consider your hardware’s capabilities and strike a balance that doesn’t overburden your system. In many AI image generation tools, resolution can often be adjusted using a simple slider or input box.
Another crucial aspect lies in **color and contrast adjustments**. These settings typically offer options to tweak **hue**, **saturation**, and **brightness**. A common tip is to use mild enhancements rather than stark changes to keep the visuals looking natural. Below is a sample table to guide you through basic color adjustment parameters:
| Parameter | Description | Recommended Range |
|---|---|---|
| Hue | Adjusts the overall tone color | -10 to +10 |
| Saturation | Modifies the intensity of colors | +10 to +30 |
| Brightness | Alters the lightness or darkness | 0 to +20 |
**Noise reduction** is another vital fine-tuning parameter. Reducing noise ensures that your images appear smoother and less pixelated. However, overly aggressive noise reduction can sometimes eliminate essential details. So, it’s best to start with a moderate value and adjust based on the preview feedback.
don’t overlook advanced settings like **style presets** and **filters** that can help further polish the output. Many AI tools come with predefined styles that can add a specific ‘look and feel’ to your images, ranging from vintage effects to modern, crisp aesthetics. Combining these presets with customized parameters can lead to stunning results that perfectly match your vision.
- **Experiment frequently**: Fine-tuning is iterative; don’t hesitate to revisit settings.
- **Use previews**: Take advantage of real-time previews to see instant changes.
- **Consult documentation**: Often, AI tools come with guides that offer preset parameter suggestions.
Incorporating User Feedback for Continuous Improvement
- Understanding User Needs: Collecting user feedback starts with understanding what users desire. Conducting surveys, holding focus groups, and leveraging social media are great ways to collect insights. Take note of the specific features and functions users are most interested in.
- Analyzing Feedback: Once feedback is collected, organize it into actionable categories. This could include common themes, feature requests, or criticisms that can be directly addressed.
- Iterative Development: Use the insights gathered to make incremental changes. Rather than overhauling the software all at once, focus on small, continuous improvements that address user pain points and enhance overall functionality.
- Prioritizing Enhancements: Not all feedback is created equal. Prioritize changes based on factors such as the number of requests for a particular feature, the potential impact of the change on overall user experience, and feasibility of implementation.
Effective incorporation of user feedback can also involve direct communication with your user base. Regularly updating users on changes being made and why, not only builds trust but creates a community of engaged users who feel their input is valued. Encourage users to participate in beta testing for new features and gather detailed feedback to further refine these features.
| Priority | Feature Request | Status |
|---|---|---|
| High | Enhanced Image Editing Tools | In Development |
| Medium | Better User Interface | Planned |
| Low | Additional Image Filters | Under Review |
Detailed documentation and transparent progress reports can make a substantial difference. Use changelogs and newsletters to update your users about what’s new and what’s coming next. Releasing regular updates that address user feedback demonstrates commitment to continuous improvement and user satisfaction.
**Creating Feedback Channels:** Set up multiple channels for users to share their thoughts, such as dedicated feedback forms, community forums, or social media polls. Implementing a formal system to capture, categorize, and prioritize feedback will streamline the process and ensure that valuable insights are actioned efficiently.
Leveraging Pre-Trained Models to Save Time
Navigating the complex world of AI image generation can be overwhelming, especially when starting from scratch. However, leveraging pre-trained models can significantly streamline the process and save you a considerable amount of time. These models come packed with invaluable data gleaned from vast datasets and are usually fine-tuned to produce high-quality images with minimal configuration. This allows you to focus more on customization and less on foundational legwork.
With pre-trained models, you can jumpstart your project by utilizing their in-built capabilities, enabling you to quickly achieve impressive results. Here’s how you can get started:
- Choose the Right Model: Different models have different strengths. Make sure you select one that aligns with your specific needs and goals.
- Fine-Tune Parameters: Pre-trained models often come with default parameters. Adjust these settings to better fit your project requirements.
- Adaptive Learning: Implementing transfer learning can further enhance the model’s performance on your custom dataset.
Another significant advantage is the vast array of community support and documentation available for popular pre-trained models. Whether you opt to use libraries like PyTorch or TensorFlow, the resources at your disposal are immense. Here’s a quick comparison of some commonly used pre-trained models:
| Model | Strengths | Best Use Case |
|---|---|---|
| ResNet | High accuracy | Image recognition |
| VGG | Efficient parameters | Image classification |
| YOLO | Real-time detection | Object detection |
These models can serve as a solid foundation upon which to build. Instead of training a model from scratch, you can harness the power of these pre-trained architectures to implement advanced features in your AI image generation software. Leveraging these models not only accelerates the development process but also improves the output quality, enabling you to deliver high-performance solutions in record time.
Creating Custom Art Styles with Advanced Techniques
Unlocking unique and compelling art styles with AI image generation software involves a mastery of several advanced techniques. **Custom color palettes** are a staple in this creative pursuit. Experimenting with color theory and understanding how shades and tones interact can immensely influence the final output. Use color sampling from existing art, nature, or even historical periods to develop a palette that sharply defines your style.
- Color Harmony: Explore complementary and analogous color schemes for a cohesive look.
- Gradient Mapping: Employ gradients to smooth transitions and add depth.
- Layer Blending: Combine multiple color layers to achieve a unique texture.
Another well-loved method is integrating **texture overlays** into your creations. Embedding textures ranging from canvas grains to fabric weaves can add an entirely new dimension to AI-generated images. Textures help give a tangible feel to your art, whether you are emulating the look of oil paints or the fine detail of a pencil sketch.
| Texture Type | Application |
|---|---|
| Canvas Grain | Oil Paint Emulation |
| Fabric Weave | Textile Patterns |
| Wood Grain | Rustic or Natural Effects |
**Fine-tuning algorithms** can unlock potential that might be dormant in general settings. Most AI image generators come with adjustable parameters. Delve into settings for noise reduction, edge detection, and detail enhancement. Adjusting these parameters can finely sculpt machine-generated images, enhancing qualities like sharpness, contrast, and overall composition.
Incorporating **cultural influences** or **personal quirks** can also make a significant difference. Use stylistic elements from artists or art movements that resonate with you. From the bold contours of Art Deco to the fragmented forms of Cubism, integrating these aspects can lend a distinctive personality to your work. Consider mixing modern digital aesthetics with traditional painting techniques for a fusion that stands out, blending the old and the new seamlessly.
Lastly, collaboration with the software itself can yield surprising results. By understanding the quirks and tendencies of your chosen tool, you can push it beyond its normal boundaries. Treat your AI as a collaborative partner rather than a mere tool, experimenting with feedback loops where your input refines and directs the software’s output.
Integrating AI with Graphic Design Software for Enhanced Creativity
Incorporating AI into graphic design software can open up new horizons for artistic expression. Personalizing AI-based tools not only increases efficiency but also provides unique avenues for creativity. Here’s how you can achieve that seamless blend for an enhanced design experience.
First and foremost, **adjust the AI settings** to match your design philosophy. Most AI image generation software allows you to tweak parameters such as color palettes, style presets, and rendering options. Tailoring these settings ensures the software complements your unique style.
- Color Palettes: Customize to reflect seasonal trends or brand guidelines.
- Style Presets: Choose from abstract, realism, or any other artistic style that resonates with your vision.
- Rendering Options: Opt for high-resolution outputs that suit print or digital formats.
Another way to optimize AI tools is through **integration with other software**. Seamlessly linking your AI image generation software with your primary design applications can streamline your workflow. For example, linking it with Adobe Photoshop or Illustrator can allow you to easily import AI-generated visuals and refine them further.
| AI Feature | Integration Benefit |
|---|---|
| Style Transfer | Quickly apply design themes across multiple projects |
| Texture Mapping | Enhance 3D models or graphical elements |
| Resolution Upgrade | Print-ready images without manual upscaling |
take advantage of **community forums and online resources** to hone your skills. Websites like GitHub, Behance, and Dribbble often offer plugins, presets, and tutorials that can push the boundaries of what your software can do. Engaging with these communities can provide fresh insights, troubleshooting tips, and incredible collaboration opportunities.
Future Outlook
We hope this article has inspired you to get creative and explore the endless possibilities of customizing AI image generation software. With a little imagination and experimentation, you can create truly unique and stunning images that reflect your individual style and vision. So don’t be afraid to push the boundaries, push your creativity, and see where it takes you. The power is in your hands to unleash the full potential of AI image generation software. Happy creating!

